
I have always been a little wary of working with chocolate as a candy medium. I am never the one who tops cupcakes with beautiful candy molds or makes chocolate-coated truffles. I mean, I love those things, but I have had serious doubts that a normal person like me could pull them off successfully.
But guess what?
I love Pinterest. Who doesn’t? And I found a cute idea for serving ice cream…and I just had to try it for the chocolate mousse I was making. So I gathered my nerves and bought a fancy bag of melting chocolate.
 Turns out, making things out of chocolate is easy!
And fun!
And looks super fancy and will impress everyone who sees it!
 First of all, let me emphasize how fantastic Ghirardelli’s new(ish) line of chocolate candy melts is! I bought a bag of dark chocolate melts. I fell in love with them. This chocolate is likely the reason I had instant success in making chocolate bowls for my mousse and, later, chocolate curls. No, your regular chocolate chips are not nearly as awesome as these. Buy some. You’ll thank me later.
If you want to make the cutest little chocolate bowls ever, all you need is a couple balloons and some melting chocolate. Seriously, you need chocolate that is specifically designed to melt easily and evenly, but will return to a smooth solid as it cools to room temperature. None of this chilling and thawing and re-melting business.
 Blow up the balloons very small. That was a weird sentence, but you get the idea. Your balloons should be able to sit inside a custard cup, because that’s about how big you want the bowls to be. Now, wash the balloons. Because no one wants to eat a dessert that tastes like chocolate and latex dust.
When the balloons are dry (feel free to help them along), melt the chocolate! With melting chocolate, this should be super easy. You don’t need to add anything to it. While I normally recommend melting chocolate over a double boiler, I decided to try the microwave this time, especially since the back of the fancy chocolate bag gave microwave directions. It turned out just fine! But you can always use a double boiler if that feels safer to you. Do take special care not to scorch the chocolate, otherwise you won’t be able to get a nice, smooth consistency for dipping or curling.
 If you go with the microwave, use short bursts, no longer than 30 seconds for the first and 15 seconds for subsequent heatings. Stir or whisk until completely smooth. When in doubt, whisk more. After microwaving, even if there are still chunks of unmelted chocolate, chances are the warmer and meltier pieces of chocolate will have enough heat to melt the holdouts. I warmed mine in the microwave for a total for 45 seconds.
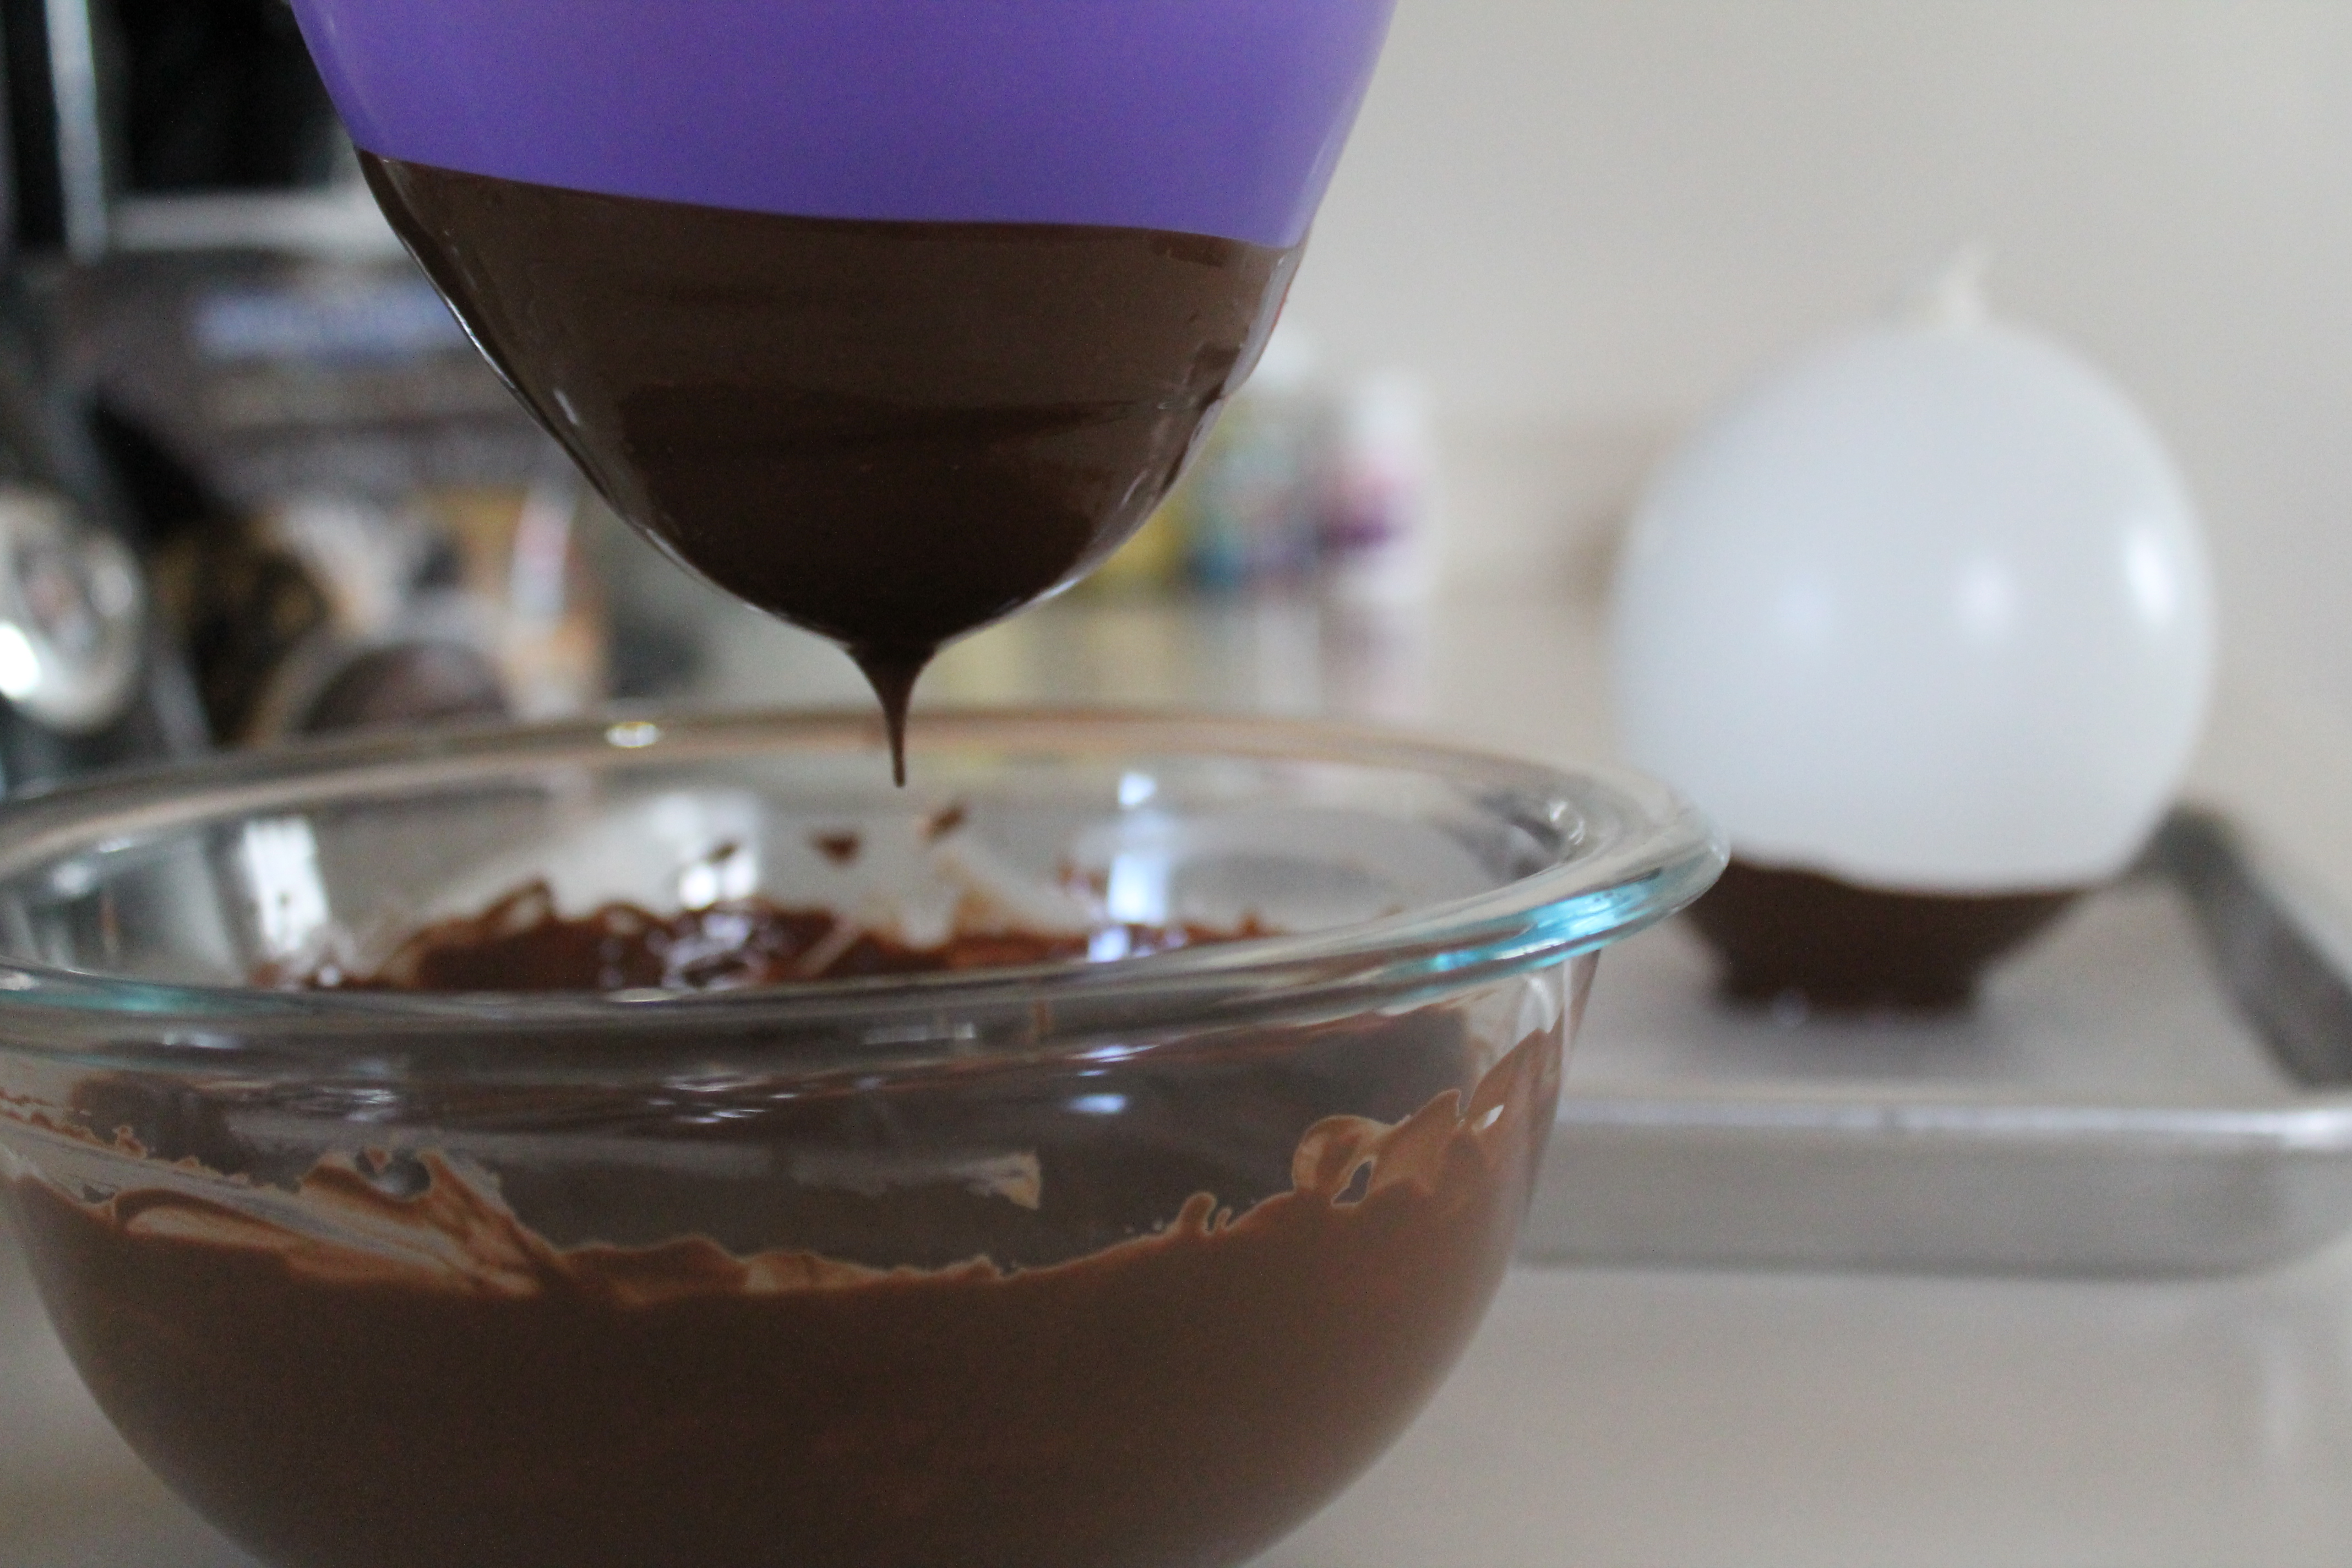 Now, set the bowl on the counter and dip the clean balloons into the liquid chocolate. Easy peasy. Don’t worry too much about dipping evenly or getting all of the edges perfect. If the bowls are higher on one side than another (which may happen anyway if the balloons sit at an angle), you can just call it artistic!
 Set the dipped balloons on a sheet of parchment paper (because it will be easy to peel them off). Chill in the fridge for 5 minutes or so.
 Pop the balloons! Peel them out of the bowls if they stick. The bowls should have little feet at the bottom so they won’t roll away, and the chocolate should be firm and sturdy enough for you to peel the bowls off the parchment without worrying about breaking them. Okay, do be a bit gentle, and maybe don’t hold them at the tippity-top edge, but this isn’t like a hollow eggshell. Melting chocolate really is fantastic!
 If you find, like me, that there are tiny little holes in the very bottom of the bowl, don’t worry! Just drizzle a dew drops of melted chocolate over the hole and return to the fridge to set.
Making chocolate curls is similarly easy, and even more fancy looking! (I used the chocolate left over from making my 4 bowls, but you could do only bowls or only curls, whatever you’d like.)
 Whisk a dab of vegetable oil into the melted chocolate. I had about half a cup of melted chocolate, and I used half a teaspoon of oil.
 Working quickly, pour the chocolate onto the clean back of a cookie sheet. Spread it as thinly as possible.
 Because melting chocolate is designed to be solid at room temperature, it will likely begin to firm up as it sits against the cool metal. If you don’t find that to be the case, then stick the pan in the fridge for 1 minute as soon as the chocolate is spread thin.
 Now grab a small, flat-sided spatula.With the spatula at about a 45° angle to the pan, bottom side up, scrape a strip of the chocolate off the pan. Work slowly, moving across the pan to create more curls!
Some of my chocolate didn’t curl right up. If your chocolate is spread too thickly, it might not curl well (or might make huge, fat curls instead of dainty ones). You can work the chocolate a little with your hands, too. As you can see, I had slightly fatter curls, as I spread my chocolate a bit thick in the center. Oops. But they were still beautiful, and I did roll a few of them by hand.
This whole process, from melting the chocolate to dipping the bowls and making the curls, took me about 12 minutes. Seriously, couldn’t be easier.
 Ta-daa! Store the curls and the bowls in the fridge until you are ready to serve them. You can pile the curls on a cake or cheesecake, or sit them in ice cream! They will make any dessert you present look elegant for almost no effort at all.
Chocolate Bowls
makes 8
Ingredients:
8 balloons, blown up about the size of two fists, maybe smaller
1 cup Ghirardelli melting wafers, or other dark chocolate candy melts
Directions:
Melt the chocolate in the microwave in short bursts, or over a double boiler. Whisk until smooth.
Dip washed and dried balloons in the melted chocolate. Set on a sheet of parchment or wax paper. Chill in the fridge for 5 minutes, or until firm.
Cut the tops of the balloons to let the air out. Peel away from the inside of the bowls. If the bottoms of the bowls have holes, drizzle a little more melted chocolate into the bottom and return to the fridge to set.
Store the bowls in the refrigerator until ready to serve.
Serve filled with ice cream, mousse, pudding, or dessert of choice!
Chocolate Curls
makes 20-30 curls, depending on the size and thinness of the chocolate
Ingredients:
1 cup Ghirardelli melting wafers, or other dark chocolate candy melts
1 tsp. vegetable oil
1 large cookie sheet
1 small, square spatula
Directions:
Melt the chocolate in the microwave in short bursts, or over a double boiler. Whisk until smooth. Stir in the oil.
Spread the chocolate as thinly as possible on the (clean) bottom side of the cookie sheet. Let it set. If it does not set as it cools to room temperature, then chill in the refrigerator for a minute or so.
With the flat bottom of the spatula, scrape stripes of chocolate off the cookie sheet. It will naturally curl. If it breaks instead of curling, set the pan in a warm oven for a few seconds and then try again. If it comes off in long, straight strips, either curl them manually or re-warm the chocolate and spread it thinner before trying again.
Store the chocolate curls in the refrigerator.
Enjoy!
- One year ago: Glazed Cinnamon Buns
- Two years ago: Aglio e Olio
2 comments to “How to Make Chocolate Curls (and Bowls!)”
Rhi - June 22, 2015
Hello,
I’m very disappointed with this recipe. Upon dipping my balloons into the melted chocolate they had burst and splattered chocolate everywhere, and I mean everywhere! It took me over an hour to clean up in my kitchen and the worse thing is I didn’t even get any chocolate cups. I don’t know how you managed to not burst your balloons but I tried everything (different balloons, temperature, technique) and they popped three times. Not impressed. Bad recipe!
Melissa - June 23, 2015
Hey, Rhi. I am so sorry this happened to you! I did not have that experience at all. My guess is that you may have had your chocolate too hot, or possibly that there was a problem with the balloons themselves. Older balloons tend to be more sensitive to touch (rubber doesn’t age well!) and more prone to popping. A potentially weird idea would be to use little water balloons instead of air balloons: we tend to fill water balloons rather small to make them less poppable, and if your balloons themselves are struggling, they would likely pop before you got around to the chocolate dipping! Plus, water can somewhat refresh tired rubber. Getting the cups off of the balloons would be a bit trickier (certainly don’t put them in the fridge or freezer!), but you could very gently squeeze the balloons to separate them from the chocolate shell. Another idea would be to simply paint the inside of some custard cups with chocolate, which is a little less cute, but certainly more foolproof! Again, I am so sorry you had a rough time with this, and I hope you have more success in the future!